
We still are not out of the woods yet health-wise. Elizabeth seems to be having a rough time of it now - she just got past a really bad upper respiratory thing, now she's got a raging ear infection in her left ear. Poor kid! It got so bad that her *eyes* hurt her.
Lots of ibuprofen and antibiotics seem to be helping, but she will miss the egg hunt that's supposed to be tomorrow. I can't let her be out in the cold wind with a gunky ear.
But I've been quite busy. Last weekend while she was at my mom's I guilt-sewed up several pairs of shorts (!!??) for her. It was so warn and wonderful outside! 70 degree weather, sunny, wonderful! NOW it is 34 and cloudy-rainy, but then.... Well, so are the wonders of living in Tennessee!


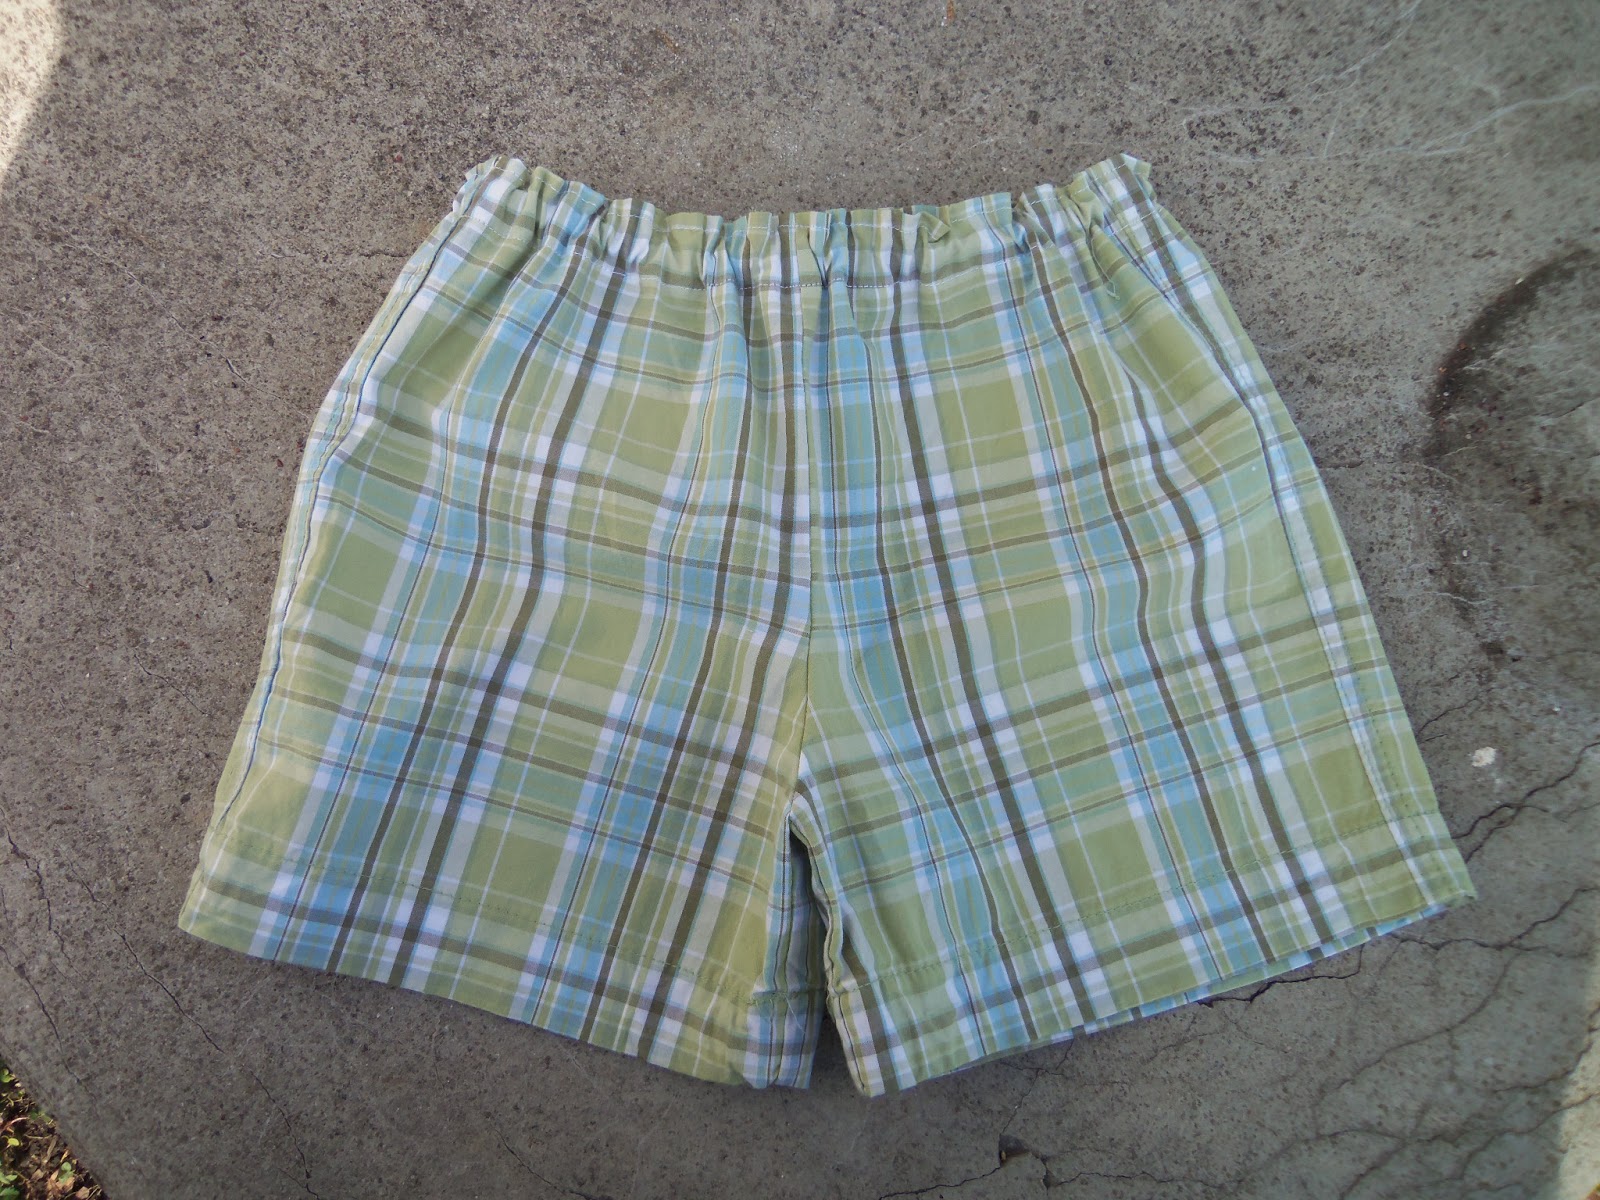

Aren't they cute? I was really worried about them being too big - I used my 4t pattern from late last summer. But my skills are much better this year and these fit great! The green plaid and the Pooh Bear ones are a touch long, but this is Tennessee and Summer lasts until October. I'll make a dress or something to go with the rainbow striped ones - I didn't even try to match the stripes and they don't look great. They were worse before I made them bloomers, tho! WHEW. Some things just don't need to be striped in rainbows!
The Sprinkle print is a cotton from Joann - I only got a remnant and it shrank so much when I washed it that I didn't know if I could get a pair of shorts out of it. But I did and they are adorable. And yes, we've made all the right jokes about carrying sprinkles on one's booty. The rainbow stripes are that wal-mart sheet from last summer. I have another whole sheet left so I'm thinking about making some sundresses to sell out of it. The green and the Pooh's are both recycled from old pants. The denim on Pooh is so soft! Elizabeth really likes these, but alas, hasn't gotten to wear them yet.
I also finishedup the Mickey Dress for the fundraiser auction! It turned out really cute - I used Rae's Geranium Dress pattern and added a collar to it.

You can tell that I don't really know much about adding collars. This was the first one I've ever drafted myself and if I'd been thinking, it would meet at the center. As it is, there's a little gap. I'm going with 'it's a vintage look' instead of the 'I'm kinda dumb and don't plan stuff very well' explanation. They have gotten it now and seem quite happy with it. I hope it will bring a nice high bid!
I've got a lot more stuff I've been working on - like Elizabeth's Easter dress and about four thousand Skater Dresses, but all the skaters are dirty and the Easter dress is not quite done (it needs buttons and my Boy Scout is at work.)

I've been churning out leggings by the truckload around here. I should have learned by now that little girls grow. Often very quickly and without warning. So, while she's still the same size *around* she is not the same height!
And I had all these adorable dresses that I made that still fit, they are just a wee bit shorter than makes me comfortable. I have issues with little girls in dresses that hit higher than the knee. Call me a prude if you must, but that's just how I am about that!
So, being the lazy sewist that I am, I really did NOT want to have to re-thread my serger every time I made a new pair of leggings! I also did not want to have have white thread showing at the bottom edge or hem after I'd sewn up the legs. That last bit is because the leg/arm holes for Elizabeth's clothes are always WAY smaller than my machine without the tray on.


If you guessed me, you are so right! Good job you!
Sorry about that. I nearly forgot to make my uncle's rice pudding. Then I nearly forgot to give it to him! So see, it was a forgetful kind of day.
But, on December 23, one of my new friends here had a baby! They did not know if they were having a boy or a girl, so I manfully waited to start sewing for tiny people until she arrived. That's right! A girl! Yahoo!
I decided last night that I would make two outfits for this new baby. Initially, I thought that I would do two Itty Bitty Baby Dresses, but I thought better of it when I couldn't decide what fabrics to use. Also, it is cold here. Thirty-three degrees is cold in Tennessee. I had a nice long think about what to make and decided with another couple of Rae's patterns - The Pierrot Tunic and her Basic Baby Pants.
First up, I lengthened the tunic into a dress. I've done this before for Elizabeth (I'll photo dump later on, I promise.) but I've never done the ruffle at the neck before. I gotta tell ya. It's stinkin' ADORABLE. I think it is a little much on one this small, only because the neck is a little stiff. But that may fix in the wash.*

I have to confess that I don't remember Elizabeth ever fitting in to things this small. But I think I have a box of tiny baby things in the basement that would prove I just have a faulty memory. I cut this one to the 3t length and hemmed nothing. That's right, nothing. I just serged the edges on everything. I think it keeps it pretty casual and ties in the serged edges of the ruffle.
Next, I did the tunic at tunic length and a pair of matching pants. These are flannel and so cosy! One thing that my friend and I agree on is not wasting stuff. So the fabric for both of these is from receiving blankets - the good kind that aren't stiff.

I hope I can deliver these things today. I'll call my friend and see if she's up for a quick stop-by to leave them.
*I never wash things for newborns. And I tell the parents this. We learned the hard and terribly painful way that Elizabeth can't be near fabric softeners at all. Ever since, I just don't even try! Most folks wash new-baby stuff first anyway.
Ahh, the Holidays. I could sit here and go on and on about how wonderful it is to be surrounded by my crazy family eating things that are bad for us, but I won't. Not today. No, today is where I issue a warning to all of you who have gotten sucked in to the hype that is pre-lit Christmas trees.
Then I'm going to tell you what to do with them after half of the lights go out due to the non-replacable fuses in the strings blowing. But first, some backstory.
The Christmas that I found out I was pregnant, I decided to get us a new tree at the post-holiday letdown markdown sales. So I went and came home with the best white tree ever! I LOVE white trees! The ornaments show up so much better and the colored lights look amazing on them. So a white one it was. Fast forward a year and Elizabeth has arrived and is celebrating her first Christmas with lots of drool and teething. We put up our tree and it looks fantastic! Fast forward another year and we are in a TINY apartment with barely enough room for all of us to be in the living room together and my white tree in a storage unit about a mile away. So no tree.
When we moved to a bigger apartment, I figured I'd find a way to fit that tree in. Then we moved in to this house and I KNEW we'd have one. So as we are moving, I give the tree the once over. It isn't white anymore. It is yellow and smells weird. (TIP: Don't store the tree in a rubbermaid box. That's no good!) So it gets tossed and the hunt for a new one begins.
Even during the sales, new ones were going for $45 or $50, and we really waffled. I'd told my mom about needed a new one and she actually found one at a Women Are Safe thrift store in my hometown. SCORE! And it was just like hers - pre-lit, 7.5 feet tall, and green. I'd long accepted that a green one would be our fate (Boy Scout wasn't crazy about my white one) and this one had his favorite - colored lights! WAHOO! So my mom bought this one and we were so excited! I helped her put hers up so that I knew whwat I was doing with ours, came home, and began. I got that whole thing together and fluffed up and plugged it in.
More than half the lights were dead. The bottom rows on the bottom and middle sections and the top of the top were dark. I unplugged, replugged, and wiggled every light.
Then the internet told me that these trees have fuse bulbs! Great! Find and replace! Easy as p....
This brand's fuse bulbs are not replaceable. If I want my pre-lit tree to work, I'll have to buy a replacement strand (actually 4 strands) from the manufacturer for $15 a strand. And put them on myself.
I'll paraphrase what I actually said about this to, "Great scott, sir! Whatever could you possibly be thinking in charging such an inflated price for something I will then have to install? I think NOT! Thank you and good day! Be sure to not let the door strike you in the hinder-end as you exit!"
Then I realized that the strings are just *wires* and if someone put them on, then I can get them off. So I did!
Now before you get all excited about ripping the lights off a pre-lit tree let me tell you something. The Chinese or Pakistani individual who put them on in the first place is an EXPERT at their job. They did their job with a complete and total dedication that I just don't think many people in this world appreciate. And I'm NOT being sarcastic, either. I don't know who they are, never met them but I admire their ability to do what they do 'cause let me tell ya - after having undone it I've concluded that there are only two people in this world who I would do that for again and both of them have put up with me since I was soiling my diapers. I've done this ONCE, the people who put these lights on do it for a living!
I *wish* I had pictures. I *wish* that I'd had the sense to take some. But I didn't. So I'm going to tell you how to do this the easiest way. I got lucky and hit on this early in the process. It still took me about 4 hours to de-light a 7.5 foot slim tree.
Step one: Stop thinking about the number of lights and tips that are on the box. If you don't stop thinking about that you will have defeated yourself from the start. Also, wear old clothes and long sleeves.
Step two: Take the tree apart in to its sections. Disconnect everything from a power source.
Step three: Starting where ever pleases you, flip your first section upside down. The bulk of the wires will cross on the underside of the branches to keep them out of plain view. As you look at the underside of the branches, there will be lines of wire crossing over the bottoms. Cut *every one* of those wires with wire cutters. Every one! These lights don't work once you've lost that non-replaceable fuse light, so there is no point in saving any part of them. CUT!
Step four: Repeat the cutting for every individual branch there is. Also, the wires that circle the trunk need to be cut too. Cut between every branch.
Step five: Now, grab one of the bulbs by it's base and PULL. If everything is cut, it will corkscrew off without much trouble. It will be kinda tough to get some going and there might be some that you missed a loop on. Just keep the cutters handy and cut whatever needs cutting. Toss the little bits of wire and lights promptly. If a light is attached with a little clip, just pull harder. Most times, the clip will come right off.
Step six: Don't forget the middle wires that circle the trunk. Just pull those things out of there. You don't have to be very gentle at all. Any of the fake needles you knock off or cut with the cutters will be just that many fewer that you have to sweep up in three weeks.
Step seven: The top is trickier - there are no hinged individual branches. Put a movie on and go one at a time.
Step eight: Walk away. Once all the lights are off, just put it down and walk away for a while. This is a hard, tedious, time consuming thing to do. Just walk away until you can come back and do the putting-up routine. For me, that was two days.
So now you ask, "Why do this at all?" Well, there's plenty of reasons. For us, it is a combination of 1) not wanting to waste my mom's money, 2) we like the shape of this one, and 3) it is still a good looking tree and we don't want to go buy a new one when an old one will still do with an investment of time on our part. That third one is a real kicker. With lights that weren't working, we did not feel right re-donating it somewhere (like taking broken toys to Goodwill.) And it was still a good looking, full, attractive tree with many more years of use in it. I can't toss something that is still useful! So, lots of hours of work and the investment is protected and there's not another tree in the landfill.
That being said, I did not realize how dangerous the job was. I advise long sleeves from experience. I didn't discover until I was in the shower that I actually had forearms covered in paper-cut like scratches. I discovered this with the help of the water. And yeah, I yelled. So cover those arms! You will be thankful you did.


